

WEB HOSTING
This guide will equip you with the steps to install phpMyAdmin on your Ubuntu 22.04 server, configured to work seamlessly with the Nginx web server. By following these instructions, you’ll gain a convenient and intuitive way to interact with your databases. We’ll delve into various security measures you can implement to safeguard your database and make informed decisions to protect your system. By following these best practice, you can significantly enhance the security posture of your phpMyAdmin environment.
Note:
PhpMyAdmin is a popular tool that streamlines database administration, letting users execute queries and manage data through a web interface. However, its widespread use and access to sensitive information make it a prime target for attackers.
Prerequisites:
Ubuntu 22.04 Server: This guide assumes you have an Ubuntu 22.04 server set up with:
- A non-root user with administrative privileges for installation tasks.
- A firewall configured with ufw for basic security. (Instructions for initial server setup.)
LEMP Stack: Ensure you have a LEMP stack (Linux, Nginx, MySQL, and PHP) installed and configured on your server. (Instructions for LEMP stack installation.)
MySQL Credentials: Since phpMyAdmin relies on MySQL credentials for authentication, it’s highly recommended to have an SSL/TLS certificate set up for your server. This encrypts communication between the server and client, safeguarding sensitive information
Warning:
While this guide focuses on recommended security practices, we understand there might be situations where an SSL/TLS certificate isn’t immediately available. In such cases, it’s crucial to prioritize secure communication methods.
Once you have these prerequisites in place, you can begin following Step 1 of this guide.
Step 1 – Installing phpmyadmin
Once the package index is updated, we’ll be ready to proceed with the actual installation of phpMyAdmin in the subsequent steps. This will involve using another command specific to the package manager to download and install the phpMyAdmin package from the Ubuntu repositories.
sudo apt update The following command is used to install the phpMyAdmin:
sudo apt install phpmyadmin
Note:
When setting up phpMyAdmin, you’ll pick which web server (like Apache or Lighttpd) it will work with.Since you’re using Nginx, ignore this step. Press TAB to select “Ok” and press ENTER to continue.
Configure Database User:
Next, you’ll be prompted to use dbconfig-common to set up the phpMyAdmin database. Choose “Yes” to proceed. This will create an internal database and user for phpMyAdmin.
Leave Password Blank (Optional):
You’ll be asked for a password for the phpMyAdmin MySQL user. This password isn’t for regular use, so you can leave it blank. phpMyAdmin will generate a secure random password for you.
Note:
If you followed the official guide to install MySQL and enabled the Validate Password plugin, you might encounter an issue during phpMyAdmin setup. This is because the plugin currently interferes with phpMyAdmin’s attempt to create a password for the ‘phpmyadmin’ user.
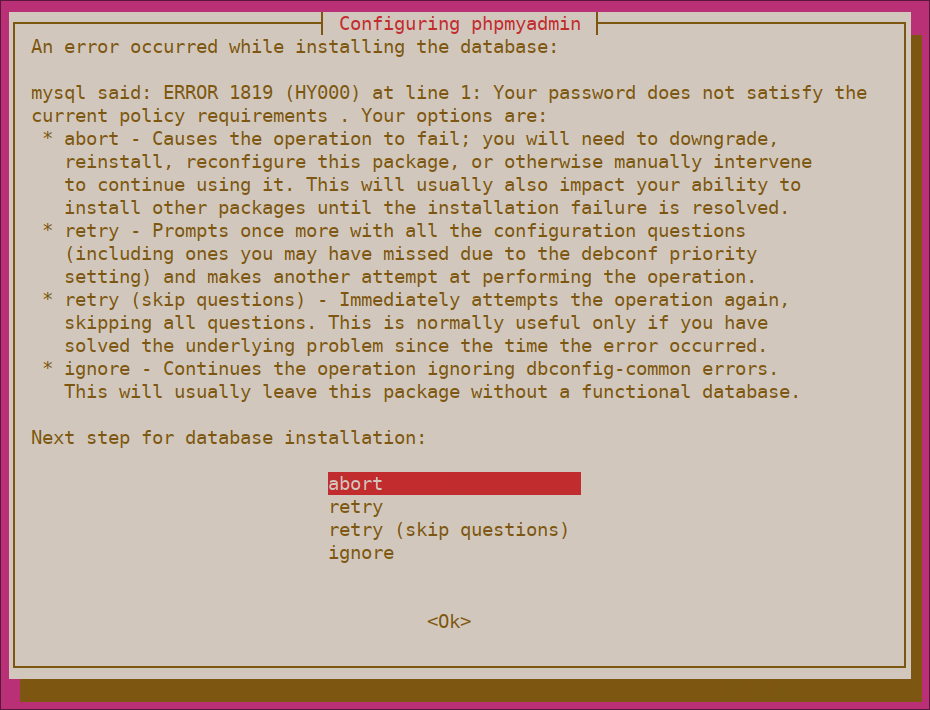
If you’re having trouble installing MySQL, you can stop the installation by choosing the “abort” option. Once the installation is stopped, you can open the MySQL prompt to troubleshoot the issue.
sudo mysql To connect as the root user in MySQL (assuming you set a password), run this command and provide your password when prompted.
mysql -u root -p On the MySQL command line, use this command to turn off password validation checks. This won’t remove the feature entirely, but it will prevent it from running on your MySQL server.
UNINSTALL COMPONENT "file://component_validate_password"; To finish your session, close the MySQL client.
exit Hindsight
Did the phpmyadmin installation not go as planned? No worries! Reinstalling the package should fix the issue and get phpmyadmin working properly.
After the installation process, phpmyadmin will be ready for use. But there's one more thing to do get the web server to find an run phpmyadmin files correctly.
If you installed phpmyadmin alongside a LEMP stack (Linux, Nginx, MySQL and PHP), the document root for Nginx might be at /var/www/your_domain/. But it's important to double check the exact location on your system for the best results.
Link phpMyAdmin folder to document root. Use:
sudo ln -s /usr/share/phpmyadmin /var/www/your_domain/phpmyadmin
Enter the IP address of your server into the address bar of your web browser, followed by “/phpmyadmin”.
https://server_domain_or_IP/phpmyadmin 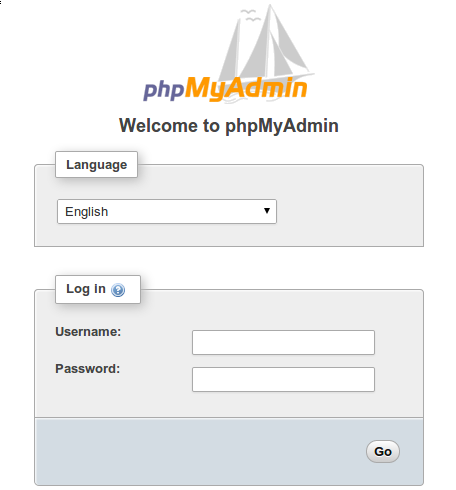
Step 2 – Changing phpmyadmin’s default location:
To add an extra layer of security, consider renaming the phpmyadmin access point. Hackers often use automated tools that scan for typical paths like /phpmyadmin. By choosing a unique URL instead, you make it much more difficult for these bots to discover your phpMyAdmin installation and launch automated attacks.
Navigate to the document root. Use:
cd /var/www/your_domain/
Then use the ls -l command. This tells the system to list the contents in a detailed format, showing extra information like file permissions and sizes.
ls -l You might see something like this in the output:
OUTPUT:
. . .
lrwxrwxrwx 1 root root 22 Jan 15 21:09 phpmyadmin ->
/usr/share/phpmyadmin/
. . .
lrwxrwxrwx 1 root root 22 Jan 15 21:09 phpmyadmin ->
/usr/share/phpmyadmin/
. . .
This line shows a symbolic link named “phpmyadmin” in this directory. The new name you choose for the endpoint should be like a secret code – it shouldn’t give away what it leads to. This guide uses “/hiddendbm” as an example throughout, but for your own security, pick a completely different name that’s unrelated to phpMyAdmin or database management. The more obscure, the better!
Rename the symbolic link with the mv command:
sudo mv phpmyadmin hiddendbm
Once you’ve run this command, double-check the link name with ls -l again to make sure the rename worked.
ls –l Now, if you check again, you’ll see the symbolic link information updated with its new name.
OUTPUT:
total 8
. . .
lrwxrwxrwx & 1 & root root 22 Jan 15 21:09 hiddendbm ->
/usr/share/phpmyadmin/
. . .
. . .
lrwxrwxrwx & 1 & root root 22 Jan 15 21:09 hiddendbm ->
/usr/share/phpmyadmin/
. . .
After renaming the access point, attempting to use the old URL to reach phpMyAdmin won’t work anymore. You’ll see a “404 Not Found” error message.
https://server_domain_or_IP/phpmyadmin 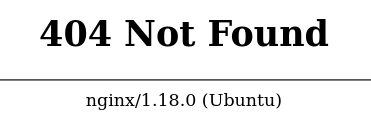
To access phpMyAdmin after the rename, head to the new URL you just set up.
https://server_domain_or_IP/hiddendbm By obscuring phpMyAdmin’s real location on the server, you’re securing its interface against automated scans and manual brute-force attempts.
Step 3 - Disabling Root Login
On MySQL, as well as within regular Linux systems, the root account is a special administrative account with unrestricted access to the system. In addition to being a privileged account, it’s a known login name, which makes it an obvious target for brute-force attacks. To minimize these risks, this step will outline how to configure phpMyAdmin to deny any login attempts coming from the root MySQL user. This way, even if you provide valid credentials for the user root, you’ll still get an Access denied! error and won’t be allowed to log in.
Since you chose to use dbconfig-common for phpMyAdmin setup, its settings are currently stored in your MySQL database. To use custom settings, you’ll need to create a new file named config.inc.php within a separate configuration directory for phpMyAdmin. It’s important to note that while the phpMyAdmin program files are located in /usr/share/phpmyadmin, its configuration files live in a different spot, specifically /etc/phpmyadmin.</span.
To make this change, create a new file named pma_secure.php inside a special folder for custom settings: /etc/phpmyadmin/conf.d.
sudo nano /etc/phpmyadmin/conf.d/pma_secure.php Then add the following content to the new file:
/etc/phpmyadmin/conf.d/pma_secure.php
<?php

# PhpMyAdmin Settings
# This should be set to a random string of at least 32 chars
$cfg['blowfish_secret'] =
'CHANGE_THIS_TO_A_STRING_OF_32_RANDOM_CHARACTERS';

$i=0;
$i++;

$cfg['Servers'][$i]['auth_type'] = 'cookie';
$cfg['Servers'][$i]['AllowNoPassword'] = false;
$cfg['Servers'][$i]['AllowRoot'] = false;

?>
The AllowNoPassword directive set to false enforces password authentication for all users. This eliminates the security vulnerability of blank passwords. Additionally, setting AllowRoot to false specifically restricts the root MySQL user, it also preventing them from logging in to phpMyAdmin. This is a recommended security practice as the root user has full administrative privileges and could cause significant damage if compromised.
By default, phpMyAdmin uses cookies to manage logins (indicated by the auth_type setting). Basically it means you can log in with any valid MySQL user credentials. When you enter your MySQL username and password, phpMyAdmin creates a temporary cookie. This cookie securely stores your encrypted password using the strong Advanced Encryption Standard AES algorithm, allowing you to stay logged in for a convenient period without re-entering your credentials every time.
In the past, phpMyAdmin used a different method Blowfish algorithm to scramble data. Now, it uses a more secure method (AES) but still references a setting named blowfish_secret. This acts like a secret ingredient for scrambling data within phpMyAdmin. You don’t need to remember it, just replace the placeholder ‘CHANGE_THIS_TO_A_STRING_OF_32_RANDOM_CHARACTERS’ with a jumbled string of at least 32 characters. This random string helps enhance security.
NOTE:
A secure passphrase is essential to protect your encrypted cookies. Here’s why:
Short passphrases (less than 32 characters) are weaker and easier to crack by attackers.
Longer passphrases (over 32 characters) are perfectly fine and provide better security.
To create a strong, random passphrase, consider using the pwgen program. It’s easy to install with APT and generates secure strings of characters.
sudo apt install pwgen While pwgen can generate passwords that are easy to remember, these might be less secure. To create a super strong password, use the -s flag. While this flag tells pwgen to generate a random password that will be much harder to guess, but also trickier to memorize.
The last two numbers in the command control the password generation:
- The first number (e.g., 32) tells pwgen how many characters to include in the password. Longer passwords are generally more secure.
- The second number (e.g., 1) tells pwgen how many passwords to generate. In this case, we only want one strong password.
pwgen -s 32 1 Run this command and copy the unique code it generates. Then, paste this code into the pma_secure.php file. Be sure to replace the placeholder text ‘CHANGE_THIS_TO_A_STRING_OF_32_RANDOM_CHARACTERS’ with the copied code. This creates a strong secret key that helps secure your phpMyAdmin installation.
Once you’ve made the edits, save the file. In nano, press Ctrl+X, then Y to confirm, and finally Enter to return to your terminal.
No need to restart anything! The changes take effect immediately. If you try logging in with the root user now, you’ll see an “Access denied!” error message. This is exactly what we.
In an effort to boost security, logging in to phpMyAdmin with the root MySQL user account is no longer allowed. This is a positive change because it prevents malicious scripts from attempting to guess the root database user’s password. Additionally, it enforces the use of accounts with fewer privileges to access phpMyAdmin, which is a recommended security practice.
Step 4 – Creating an Authentication Gateway
While hiding phpMyAdmin in a non-standard location might fool some automated scanners, it won’t stop determined attackers. The best defense for web applications is to prevent attackers from reaching them in the first place. This eliminates the risk of automated attacks and credential guessing attempts.
Leaving phpMyAdmin’s login open is like giving away the keys to your digital vault. Attackers constantly scan the internet for unsecured phpMyAdmin installations. Once they find one, they can unleash automated programs that bombard the login page with countless username and password combinations. These “brute-force attacks” can crack weak credentials quickly, granting them access to your entire database. By securing phpMyAdmin login, you throw a major roadblock in their path and significantly reduce the risk of a successful attack.
This guide will show you how to add an extra layer of protection for your phpMyAdmin login. Most web servers, like Nginx, actually have this built-in functionality. By following these steps, anyone trying to access phpMyAdmin will need to provide a username and password before they even see the regular login screen. This makes it much harder for unauthorized users to access your databases.
To activate this,
Create a password file: This file will hold the encrypted credentials for authorized users.
Encrypt passwords: Nginx requires passwords to be scrambled using a specific function (crypt()). Thankfully, most Ubuntu servers already have the necessary tools (OpenSSL) to handle this encryption.
To create an secure password, type:
openssl passwd Pick your password, type it twice to make sure the you got it right You’ll see a weird mix of characters – that’s the secret code the system uses to keep your password safe.
OUTPUT:
9YHV.p60.Cg6I
This code is your password in a secure format. You’ll need to copy and paste it into a special file to enable login protection for phpMyAdmin. Next, create a new file. Let’s call this file pma_pass (you can choose another name). This file will be placed in the directory where nginx stores its configuration settings.
sudo nano /etc/nginx/pma_pass In this file, choose any username you like. It doesn’t need to match an existing user on your system. Enter the scrambled characters you received from the openssl passwd utility. This is the encrypted version of your chosen password.
Once you enter your chosen username and paste the encrypted password you copied, the file content will appear similar to this:
/etc/nginx/pma_pass
sammy:9YHV.p60.Cg6I
Once the process is completed save and close the file.
Next step is, you need to change the nginx configuration file. This guide assumes you followed the prerequisite LEMP tutorial, this file used in the /etc/nginx/sites-available/your_domain. Make sure you locate the correct Nginx configuration file that corresponds to the location where your phpMyAdmin is installed.
Ready to edit your Nginx configuration? Open the configuration file in your preferred text editor.
sudo nano /etc/nginx/sites-available/your_domain Look for a section called server block in your configuration file. Inside this block, locate a section labeled location /. This section defines how the server handles requests for the root directory (usually your website’s main page).
Remember that, in step 2, you renamed the shortcut (symbolic link) for phpMyAdmin. Here, you just need to enter that new name, not the entire file path. Think of it like a nickname you gave phpMyAdmin within your system’s main folder for web content (Nginx document root directory).
/etc/nginx/sites-available/your_domain
server {
        . . .

        location / {
                try_files $uri $uri/ =404;
        }

        location ^~ /hiddendbm {

        }

        . . .
}
In this section, configure two directives: auth_basic: This directive determines the message users see when prompted to log in. You can customize this message. auth_basic_user_file: This directive points to the file you just created containing usernames and encrypted passwords. Add these two directives to the new location section.
/etc/nginx/sites-available/your_domain
server {
        . . .
        location / {
                try_files $uri $uri/ =404;
        }

        location ^~ /hiddendbm {
                auth_basic "Admin Login";
                auth_basic_user_file /etc/nginx/pma_pass;
        }
        . . .
}
This block uses the “^~” selector before the location definition. This is crucial to ensure Nginx doesn’t ignore your access rules. Here’s why:
In Nginx configuration, regular expressions used to define locations (like catching all .php files) have a higher priority than standard location definitions. So, if we don’t use “^~” at the beginning of this location block, users could still access hidden files by adding “index.php” to the URL in their browser. For example, they could access a hidden file at “http://server_domain_or_ip/hiddendbm/index.php” even if your access rules block http://server_domain_or_ip/hidden dbm/”.
&nbs/etc/nginx/sites-available/your_domain
server
server {
        . . .

        location / {
                try_files $uri $uri/ =404;
        }

        location ^~ /hiddendbm/ {
                auth_basic "Admin Login";
                auth_basic_user_file /etc/nginx/pma_pass;

                location ~ \.php$ {
                        include snippets/fastcgi-php.conf;
                        fastcgi_pass unix:/var/run/php/php7.4-fpm.sock;
                }
        }
    . . .
}
phpMyAdmin Path: Replace “hiddendbm” with the actual location where phpMyAdmin is installed on your system.
PHP-FPM Socket File: The path to the PHP-FPM socket file will vary depending on your PHP version. Double-check the location on your server. This keeps the information clear and avoids mentioning specific examples like php7.4-fpm.sock which might not apply to all users.
Save and close the file once you have finished the process. To ensure that the configuration file is valid or not, run the below command:
sudo nginx -t The following message indicates your configuration file has no syntax errors and appears valid.
OUTPUT:
nginx:
the configuration file /etc/nginx/nginx.conf syntax is ok
nginx: configuration file /etc/nginx/nginx.conf test is successful
nginx: configuration file /etc/nginx/nginx.conf test is successful
For the new authentication to take effect, send a reload signal to Nginx.
sudo systemctl reload nginx When you are in the phpmyadmin URL in web browser, you need to enter the username and password that added to pma_pass file:
https://server_domain_or_IP/hiddendbm 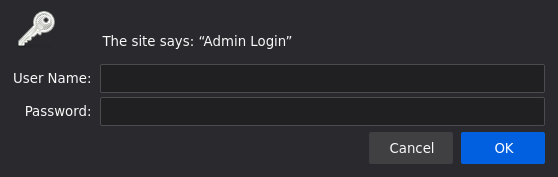
Upon entering your valid credentials, you’ll be redirected to the standard phpMyAdmin login interface where you can manage your databases.
Note:
Sometimes, you might not see the phpmyadmin login screen right away, especially if you accessed it recently. Just refresh a page, clear the cache and try to use in different browser window.
Moreover, to provide an extra layer security, This also keeps your MySQL logs free of clutter from spammy attempts, making it easier to identify any genuine security concerns.
This guide will equip you with the steps to install phpMyAdmin on your Ubuntu 22.04 server, configured to work seamlessly with the Nginx web server. By following these instructions, you’ll gain a convenient and intuitive way to interact with your databases. We’ll delve into various security measures you can implement to safeguard your database and make informed decisions to protect your system. By following these best practice, you can significantly enhance the security posture of your phpMyAdmin environment.
Note:
PhpMyAdmin is a popular tool that streamlines database administration, letting users execute queries and manage data through a web interface. However, its widespread use and access to sensitive information make it a prime target for attackers.
Prerequisites:
Ubuntu 22.04 Server: This guide assumes you have an Ubuntu 22.04 server set up with:
- A non-root user with administrative privileges for installation tasks.
- A firewall configured with ufw for basic security. (Instructions for initial server setup.)
LEMP Stack: Ensure you have a LEMP stack (Linux, Nginx, MySQL, and PHP) installed and configured on your server. (Instructions for LEMP stack installation.)
MySQL Credentials: Since phpMyAdmin relies on MySQL credentials for authentication, it’s highly recommended to have an SSL/TLS certificate set up for your server. This encrypts communication between the server and client, safeguarding sensitive information
Warning:
While this guide focuses on recommended security practices, we understand there might be situations where an SSL/TLS certificate isn’t immediately available. In such cases, it’s crucial to prioritize secure communication methods.
Once you have these prerequisites in place, you can begin following Step 1 of this guide.
Step 1 – Installing phpmyadmin
Once the package index is updated, we’ll be ready to proceed with the actual installation of phpMyAdmin in the subsequent steps. This will involve using another command specific to the package manager to download and install the phpMyAdmin package from the Ubuntu repositories.
sudo apt update The following command is used to install the phpMyAdmin:
sudo apt install phpmyadmin
Note:
When setting up phpMyAdmin, you’ll pick which web server (like Apache or Lighttpd) it will work with.Since you’re using Nginx, ignore this step. Press TAB to select “Ok” and press ENTER to continue.
Configure Database User:
Next, you’ll be prompted to use dbconfig-common to set up the phpMyAdmin database. Choose “Yes” to proceed. This will create an internal database and user for phpMyAdmin.
Leave Password Blank (Optional):
You’ll be asked for a password for the phpMyAdmin MySQL user. This password isn’t for regular use, so you can leave it blank. phpMyAdmin will generate a secure random password for you.
Note:
If you followed the official guide to install MySQL and enabled the Validate Password plugin, you might encounter an issue during phpMyAdmin setup. This is because the plugin currently interferes with phpMyAdmin’s attempt to create a password for the ‘phpmyadmin’ user.
If you’re having trouble installing MySQL, you can stop the installation by choosing the “abort” option. Once the installation is stopped, you can open the MySQL prompt to troubleshoot the issue.
sudo mysql To connect as the root user in MySQL (assuming you set a password), run this command and provide your password when prompted.
mysql -u root -p On the MySQL command line, use this command to turn off password validation checks. This won’t remove the feature entirely, but it will prevent it from running on your MySQL server.
UNINSTALL COMPONENT "file://component_validate_password"; To finish your session, close the MySQL client.
exit Hindsight
Did the phpmyadmin installation not go as planned? No worries! Reinstalling the package should fix the issue and get phpmyadmin working properly.
After the installation process, phpmyadmin will be ready for use. But there's one more thing to do get the web server to find and run phpmyadmin files correctly.
If you installed phpmyadmin alongside a LEMP stack (Linux, Nginx, MYSQL and PHP), the document root for Nginx might be at /var/www/your_domain/. But it's important to double check the exact location on your system for the best results.
Link phpMyAdmin folder to document root. Use:
sudo ln -s /usr/share/phpmyadmin /var/www/your_domain/phpmyadmin
Enter the IP address of your server into the address bar of your web browser, followed by “/phpmyadmin”.
https://server_domain_or_IP/phpmyadmin Step 2 – Changing phpmyadmin’s default location:
To add an extra layer of security, consider renaming the phpmyadmin access point. Hackers often use automated tools that scan for typical paths like /phpmyadmin. By choosing a unique URL instead, you make it much more difficult for these bots to discover your phpMyAdmin installation and launch automated attacks.
Navigate to the document root. Use:
cd /var/www/your_domain/
Then use the ls -l command. This tells the system to list the contents in a detailed format, showing extra information like file permissions and sizes.
ls -l You might see something like this in the output:
OUTPUT:
. . .
lrwxrwxrwx 1 root root 22 Jan 15 21:09 phpmyadmin ->
/usr/share/phpmyadmin/
. . .
lrwxrwxrwx 1 root root 22 Jan 15 21:09 phpmyadmin ->
/usr/share/phpmyadmin/
. . .
This line shows a symbolic link named “phpmyadmin” in this directory. The new name you choose for the endpoint should be like a secret code – it shouldn’t give away what it leads to. This guide uses “/hiddendbm” as an example throughout, but for your own security, pick a completely different name that’s unrelated to phpMyAdmin or database management. The more obscure, the better!
Rename the symbolic link with the mv command:
sudo mv phpmyadmin hiddendbm
Once you’ve run this command, double-check the link name with ls -l again to make sure the rename worked.
ls –l Now, if you check again, you’ll see the symbolic link information updated with its new name.
OUTPUT:
total 8
. . .
lrwxrwxrwx 1 root root 22 Jan 15 21:09 hiddendbm ->
/usr/share/phpmyadmin/
. . .
. . .
lrwxrwxrwx 1 root root 22 Jan 15 21:09 hiddendbm ->
/usr/share/phpmyadmin/
. . .
After renaming the access point, attempting to use the old URL to reach phpMyAdmin won’t work anymore. You’ll see a “404 Not Found” error message.
https://server_domain_or_IP/phpmyadmin To access phpMyAdmin after the rename, head to the new URL you just set up.
https://server_domain_or_IP/hiddendbm By obscuring phpMyAdmin’s real location on the server, you’re securing its interface against automated scans and manual brute-force attempts.
Step 3 - Disabling Root Login
On MySQL, as well as within regular Linux systems, the root account is a special administrative account with unrestricted access to the system. In addition to being a privileged account, it’s a known login name, which makes it an obvious target for brute-force attacks. To minimize these risks, this step will outline how to configure phpMyAdmin to deny any login attempts coming from the root MySQL user. This way, even if you provide valid credentials for the user root, you’ll still get an Access denied! error and won’t be allowed to log in.
Since you chose to use dbconfig-common for phpMyAdmin setup, its settings are currently stored in your MySQL database. To use custom settings, you’ll need to create a new file named config.inc.php within a separate configuration directory for phpMyAdmin. It’s important to note that while the phpMyAdmin program files are located in /usr/share/phpmyadmin, its configuration files live in a different spot, specifically /etc/phpmyadmin.</span.
To make this change, create a new file named pma_secure.php inside a special folder for custom settings: /etc/phpmyadmin/conf.d.
sudo nano /etc/phpmyadmin/conf.d/pma_secure.php Then add the following content to the new file:
/etc/phpmyadmin/conf.d/pma_secure.php
<?php

# PhpMyAdmin Settings
# This should be set to a random string of at least 32 chars
$cfg['blowfish_secret'] =
'CHANGE_THIS_TO_A_STRING_OF_32_RANDOM_CHARACTERS';

$i=0;
$i++;

$cfg['Servers'][$i]['auth_type'] = 'cookie';
$cfg['Servers'][$i]['AllowNoPassword'] = false;
$cfg['Servers'][$i]['AllowRoot'] = false;

?>
The AllowNoPassword directive set to false enforces password authentication for all users. This eliminates the security vulnerability of blank passwords. Additionally, setting AllowRoot to false specifically restricts the root MySQL user, it also preventing them from logging in to phpMyAdmin. This is a recommended security practice as the root user has full administrative privileges and could cause significant damage if compromised.
By default, phpMyAdmin uses cookies to manage logins (indicated by the auth_type setting). Basically it means you can log in with any valid MySQL user credentials. When you enter your MySQL username and password, phpMyAdmin creates a temporary cookie. This cookie securely stores your encrypted password using the strong Advanced Encryption Standard AES algorithm, allowing you to stay logged in for a convenient period without re-entering your credentials every time.
In the past, phpMyAdmin used a different method Blowfish algorithm to scramble data. Now, it uses a more secure method (AES) but still references a setting named blowfish_secret. This acts like a secret ingredient for scrambling data within phpMyAdmin. You don’t need to remember it, just replace the placeholder ‘CHANGE_THIS_TO_A_STRING_OF_32_RANDOM_CHARACTERS’ with a jumbled string of at least 32 characters. This random string helps enhance security.
NOTE:
A secure passphrase is essential to protect your encrypted cookies. Here’s why:
Short passphrases (less than 32 characters) are weaker and easier to crack by attackers.
Longer passphrases (over 32 characters) are perfectly fine and provide better security.
To create a strong, random passphrase, consider using the pwgen program. It’s easy to install with APT and generates secure strings of characters.
sudo apt install pwgen While pwgen can generate passwords that are easy to remember, these might be less secure. To create a super strong password, use the -s flag. While this flag tells pwgen to generate a random password that will be much harder to guess, but also trickier to memorize.
The last two numbers in the command control the password generation:
- The first number (e.g., 32) tells pwgen how many characters to include in the password. Longer passwords are generally more secure.
- The second number (e.g., 1) tells pwgen how many passwords to generate. In this case, we only want one strong password.
pwgen -s 32 1 Run this command and copy the unique code it generates. Then, paste this code into the pma_secure.php file. Be sure to replace the placeholder text ‘CHANGE_THIS_TO_A_STRING_OF_32_RANDOM_CHARACTERS’ with the copied code. This creates a strong secret key that helps secure your phpMyAdmin installation.
Once you’ve made the edits, save the file. In nano, press Ctrl+X, then Y to confirm, and finally Enter to return to your terminal.
No need to restart anything! The changes take effect immediately. If you try logging in with the root user now, you’ll see an “Access denied!” error message. This is exactly what we.
In an effort to boost security, logging in to phpMyAdmin with the root MySQL user account is no longer allowed. This is a positive change because it prevents malicious scripts from attempting to guess the root database user’s password. Additionally, it enforces the use of accounts with fewer privileges to access phpMyAdmin, which is a recommended security practice.
Step 4 – Creating an Authentication Gateway
While hiding phpMyAdmin in a non-standard location might fool some automated scanners, it won’t stop determined attackers. The best defense for web applications is to prevent attackers from reaching them in the first place. This eliminates the risk of automated attacks and credential guessing attempts.
Leaving phpMyAdmin’s login open is like giving away the keys to your digital vault. Attackers constantly scan the internet for unsecured phpMyAdmin installations. Once they find one, they can unleash automated programs that bombard the login page with countless username and password combinations. These “brute-force attacks” can crack weak credentials quickly, granting them access to your entire database. By securing phpMyAdmin login, you throw a major roadblock in their path and significantly reduce the risk of a successful attack.
This guide will show you how to add an extra layer of protection for your phpMyAdmin login. Most web servers, like Nginx, actually have this built-in functionality. By following these steps, anyone trying to access phpMyAdmin will need to provide a username and password before they even see the regular login screen. This makes it much harder for unauthorized users to access your databases.
To activate this,
Create a password file: This file will hold the encrypted credentials for authorized users.
Encrypt passwords: Nginx requires passwords to be scrambled using a specific function (crypt()). Thankfully, most Ubuntu servers already have the necessary tools (OpenSSL) to handle this encryption.
To create an secure password, type:
openssl passwd Pick your password, type it twice to make sure the you got it right You’ll see a weird mix of characters – that’s the secret code the system uses to keep your password safe.
OUTPUT:
9YHV.p60.Cg6I
This code is your password in a secure format. You’ll need to copy and paste it into a special file to enable login protection for phpMyAdmin. Next, create a new file. Let’s call this file pma_pass (you can choose another name). This file will be placed in the directory where nginx stores its configuration settings.
sudo nano /etc/nginx/pma_pass In this file, choose any username you like. It doesn’t need to match an existing user on your system. Enter the scrambled characters you received from the openssl passwd utility. This is the encrypted version of your chosen password.
Once you enter your chosen username and paste the encrypted password you copied, the file content will appear similar to this:
/etc/nginx/pma_pass
sammy:9YHV.p60.Cg6I
Once the process is completed save and close the file.
Next step is, you need to change the nginx configuration file. This guide assumes you followed the prerequisite LEMP tutorial, this file used in the /etc/nginx/sites-available/your_domain. Make sure you locate the correct Nginx configuration file that corresponds to the location where your phpMyAdmin is installed.
Ready to edit your Nginx configuration? Open the configuration file in your preferred text editor.
sudo nano /etc/nginx/sites-available/your_domain Look for a section called server block in your configuration file. Inside this block, locate a section labeled location /. This section defines how the server handles requests for the root directory (usually your website’s main page).
Remember that, in step 2, you renamed the shortcut (symbolic link) for phpMyAdmin. Here, you just need to enter that new name, not the entire file path. Think of it like a nickname you gave phpMyAdmin within your system’s main folder for web content (Nginx document root directory).
/etc/nginx/sites-available/your_domain
server {
        . . .

        location / {
                try_files $uri $uri/ =404;
        }

        location ^~ /hiddendbm {

        }

        . . .
}
In this section, configure two directives: auth_basic: This directive determines the message users see when prompted to log in. You can customize this message. auth_basic_user_file: This directive points to the file you just created containing usernames and encrypted passwords. Add these two directives to the new location section.
/etc/nginx/sites-available/your_domain
server {
        . . .
        location / {
                try_files $uri $uri/ =404;
        }

        location ^~ /hiddendbm {
                auth_basic "Admin Login";
                auth_basic_user_file /etc/nginx/pma_pass;
        }
        . . .
}
This block uses the “^~” selector before the location definition. This is crucial to ensure Nginx doesn’t ignore your access rules. Here’s why:
In Nginx configuration, regular expressions used to define locations (like catching all .php files) have a higher priority than standard location definitions. So, if we don’t use “^~” at the beginning of this location block, users could still access hidden files by adding “index.php” to the URL in their browser. For example, they could access a hidden file at “http://server_domain_or_ip/hiddendbm/index.php” even if your access rules block http://server_domain_or_ip/hidden dbm/”.
&nbs/etc/nginx/sites-available/your_domain
server
server {
        . . .

        location / {
                try_files $uri $uri/ =404;
        }

        location ^~ /hiddendbm/ {
                auth_basic "Admin Login";
                auth_basic_user_file /etc/nginx/pma_pass;

                location ~ \.php$ {
                        include snippets/fastcgi-php.conf;
                        fastcgi_pass unix:/var/run/php/php7.4-fpm.sock;
                }
        }
    . . .
}
phpMyAdmin Path: Replace “hiddendbm” with the actual location where phpMyAdmin is installed on your system.
PHP-FPM Socket File: The path to the PHP-FPM socket file will vary depending on your PHP version. Double-check the location on your server. This keeps the information clear and avoids mentioning specific examples like php7.4-fpm.sock which might not apply to all users.
Save and close the file once you have finished the process. To ensure that the configuration file is valid or not, run the below command:
sudo nginx -t The following message indicates your configuration file has no syntax errors and appears valid.
OUTPUT:
nginx: the configuration file /etc/nginx/nginx.conf syntax is ok
nginx: configuration file /etc/nginx/nginx.conf test is successful
nginx: configuration file /etc/nginx/nginx.conf test is successful
For the new authentication to take effect, send a reload signal to Nginx.
sudo systemctl reload nginx When you are in the phpmyadmin URL in web browser, you need to enter the username and password that added to pma_pass file:
https://server_domain_or_IP/hiddendbm Upon entering your valid credentials, you’ll be redirected to the standard phpMyAdmin login interface where you can manage your databases.
Note:
Sometimes, you might not see the phpmyadmin login screen right away, especially if you accessed it recently. Just refresh a page, clear the cache and try to use in different browser window.
Moreover, to provide an extra layer security, This also keeps your MySQL logs free of clutter from spammy attempts, making it easier to identify any genuine security concerns.